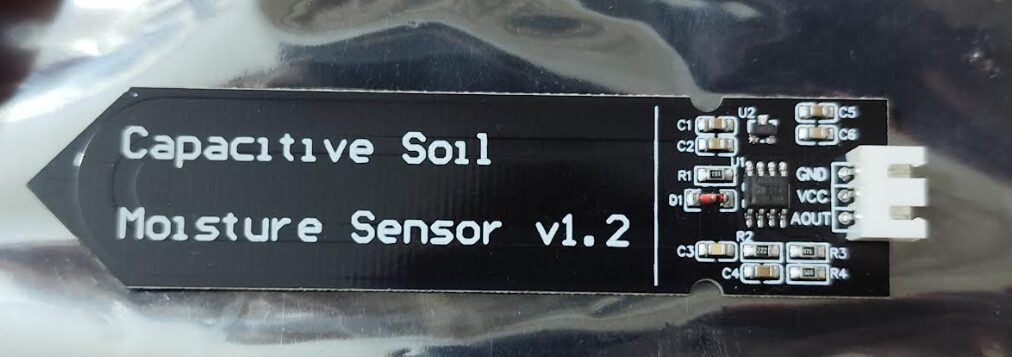
What is a Capacitive Soil Moisture Sensor?
A capacitive soil moisture sensor measures soil moisture levels by detecting changes in capacitance caused by the presence of water. It is non-corrosive, making it durable compared to resistive moisture sensors, and can provide real-time soil moisture readings. This sensor is useful for home automation, especially for gardeners and hobbyists who want to automate watering systems based on soil conditions.
Why Monitor Soil Moisture?
Monitoring soil moisture levels is crucial for ensuring the health of plants. Overwatering or underwatering can stress plants, leading to poor growth or death. With a capacitive sensor, you can track soil moisture in real time and automate your irrigation system accordingly, ensuring your plants receive just the right amount of water.
Calibrating the Sensor
To get accurate readings from your soil moisture sensor, calibration is essential. In my case, I took measurements from the sensor when the soil was completely dry and when it was fully submerged in water to establish baseline values. Here’s what I observed:
- Dry soil (0.67480V)
- Wet soil (0.28613V)
By mapping these voltage values to a percentage (0% for dry and 100% for wet), I can now monitor moisture levels more intuitively.
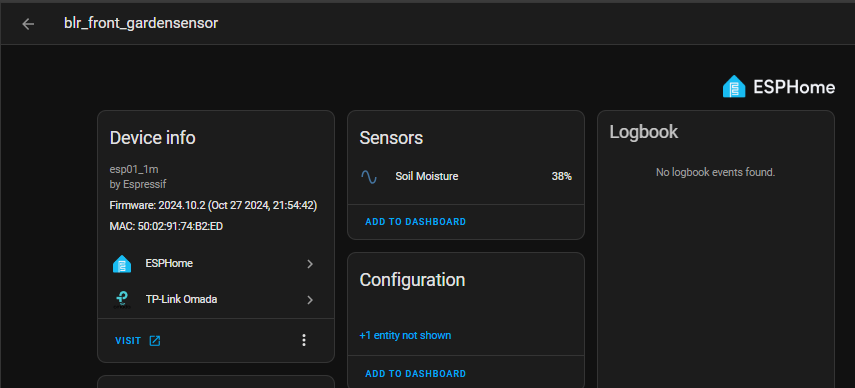
Configuring the ESP32 with ESPHome and Home Assistant
Below is the code I used to configure my ESP32 with ESPHome and link it to Home Assistant:
esphome:
  name: blrfmoisturesensor
  friendly_name: blr_front_gardensensor

esp8266:
  board: esp01_1m

# Enable logging
logger:

# Enable Home Assistant API
api:
  encryption:
    key: "XXXXXXXXXXXXXXXXXXXXXXXXXXXXXXXXXXXX="

ota:
  password: "XXXXXXXXXXXXXXXXXXXXXXXXXXXXXXXXXXXX"

wifi:
  ssid: !secret wifi_ssid
  password: !secret wifi_password

  manual_ip:
    static_ip: 192.168.0.176
    gateway: 192.168.0.1
    subnet: 255.255.255.0
    dns1: 192.168.0.3
    dns2: 192.168.0.47

ap:
  ssid: "front_gardensensor Hotspot "
  password: "XXXXXXXXXXXXXXXXXXXXXXXXXXXXXXXXXXXX"

captive_portal:

sensor:
  - platform: adc
    pin: A0
    name: "Soil Moisture"
    update_interval: 10s
    unit_of_measurement: "%"
    accuracy_decimals: 0
    filters:
      - calibrate_linear:
          - 0.67480 -> 0    # Dry soil (0.67480V)
          - 0.28613 -> 100   # Wet soil (0.28613V)
      - lambda: |-
          if (x < 0) return 0;
          else if (x > 100) return 100;
          else return x;
Connecting the Sensor to ESP32
- A0 (Analog Output) of the sensor is connected to A0 on the ESP32.
- GND is connected to GND on the ESP32.
- VCC is connected to the 3.3V pin on the ESP32.
Conclusion
This simple setup allows you to monitor soil moisture levels and integrate them with Home Assistant to automate tasks like irrigation. By calibrating the sensor and configuring it with ESPHome, the data becomes much more usable and actionable.
Acknowledgment
A big thank you to the developers of ESPHome and Home Assistant for providing such powerful and flexible open-source tools that make smart home automation projects like this possible.
Appreciated 👏👏👏 💐